

How To Create Poll Outlook
Did you know in Microsoft Outlook there is a feature to create a voting poll? Creating email polls in Microsoft Outlook can assist you to ask a question then send it by email to receive feedback from recipients. Once the message is sent, the recipients will vote directly in email.
In Outlook, there is a quick poll feature, but if you do not see a quick poll feature on the insert tab, there is another method to create a poll. In this tutorial, we will explain this method.
How to create a Poll in Outlook
Open Outlook.

Click the New Email button.
In the New Email window, click the Options tab.
In the Tracking group, click Use Voting Button drop-down arrow.
The Use Voting Button is a feature in Outlook that adds a voting button to the message. The person reading the message can vote for any of the options you indicate, and the vote will be sent back to you as a particular email message.
In the list, you have options such as Approve; Reject, Yes; No, Yes; No; Maybe, and Custom, where you can customize your options.
In this tutorial, we want to create our options; we will click Custom in the list.

A Properties dialog box will open.
In the section Voting and tracking options, ensure that the checkbox for using voting buttons is clicked.
In the list box, enter the options you want.
Then close the dialog box.
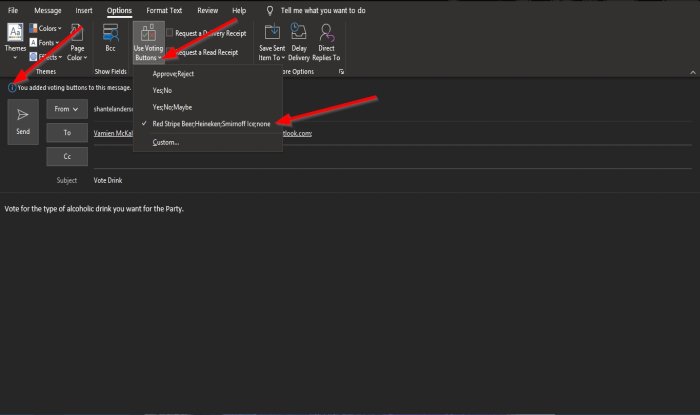
You will see a confirmation button above the message stating, You added voting buttons to this message.
If you click the Use Voting Button feature again, you will see the options you entered in the Properties dialog box in the list.
Ensure the custom option is ticked.
Then click Send.
Even if you are the sender, you can also vote in this poll.
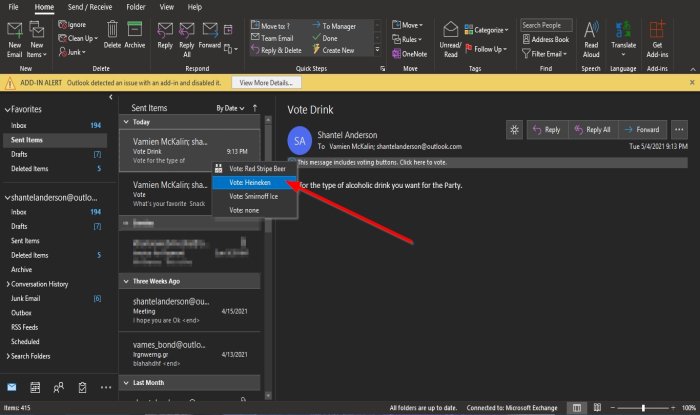
InSent items, click the poll email you just sent.
You will see a button above your email message stating, You added voting buttons to this message. Click here to vote.
Click the button and choose an option.
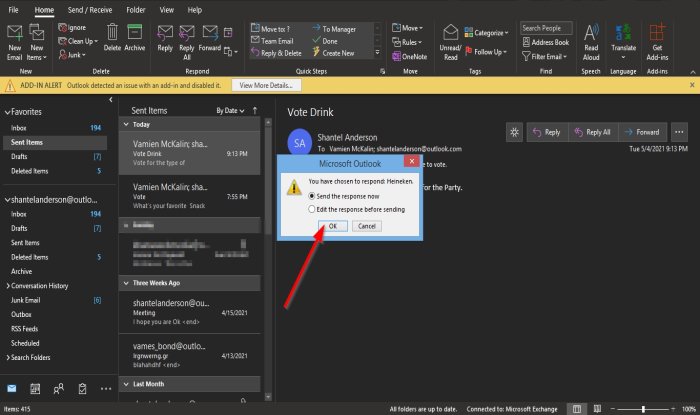
A Microsoft Outlook dialog box will open with options to Send the response now or Edit the response before sending.
We choose to Send the response now.
Then Ok.
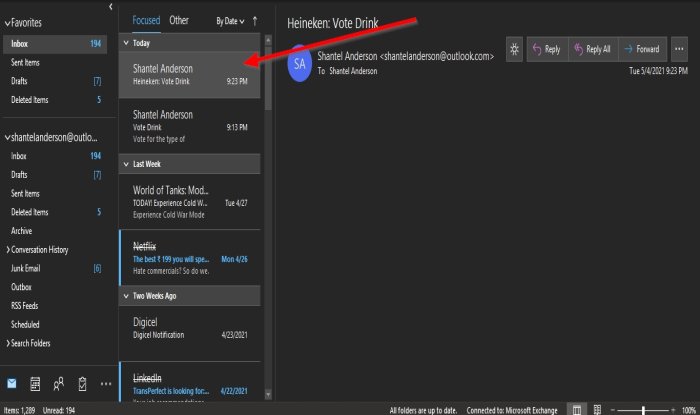
In the Inbox, you will see what the person or persons vote for.
We hope this tutorial helps you understand how to create an Email Poll in Outlook.
Related: Outlook Command Line Switches on Windows 10.

Shantel is a university student studying for Bachelor of Science in Information Technology. Her goal is to become a Database Administrator or a System Administrator. She enjoys reading and watching historical documentaries and dramas.
How To Create Poll Outlook
Source: https://www.thewindowsclub.com/how-to-create-poll-in-outlook
Posted by: wellersualking.blogspot.com
0 Response to "How To Create Poll Outlook"
Post a Comment